Crispy Chickpea Lunch Wraps
Highlighted under: Basic Cooking | Easy Food
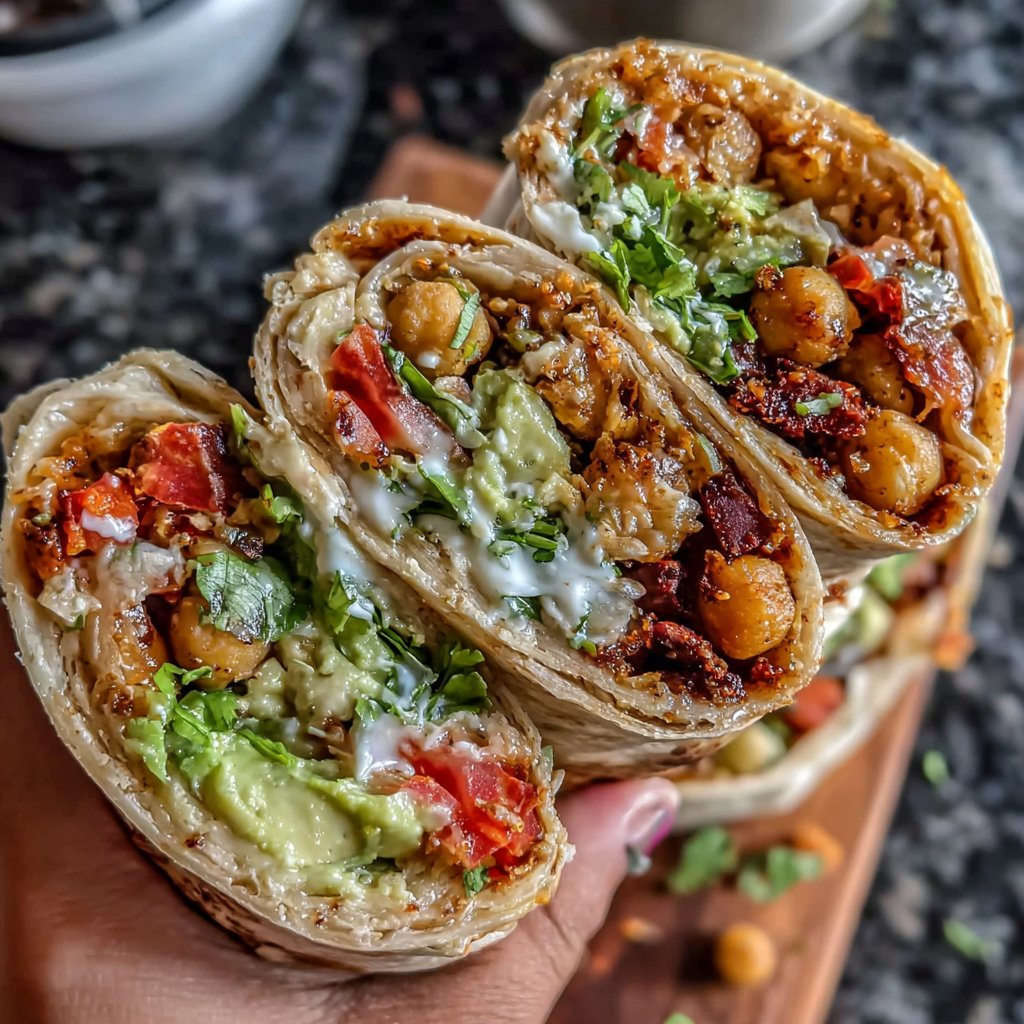
I absolutely love making these Crispy Chickpea Lunch Wraps for a quick lunch or a satisfying snack. They are packed with flavor and texture, yet are incredibly simple to prepare. The combination of crispy chickpeas and fresh veggies wrapped in a soft tortilla is not only delicious but also nutritious. I often whip these up when I want something healthy and colorful on my plate, and they never disappoint. They are perfect for meal prep, and I promise they will keep you full and energized throughout the day!
When I first tried crispy chickpeas in a wrap, I was amazed at how perfectly they complemented the fresh vegetables. After experimenting with various spices, I discovered that a simple blend of paprika and garlic powder adds just the right zing. I often swap out toppings based on seasonal veggies, which is a great way to keep this dish refreshing.
I recommend baking the chickpeas until they are extra crispy; it makes such a difference in texture. Plus, using a soft tortilla allows the flavors to meld beautifully without overpowering the crunchiness of the chickpeas. Give it a try!
Why You'll Love These Wraps
- Crispy texture that contrasts beautifully with fresh veggies
- Versatile and can be customized with your favorite toppings
- Perfect for meal prep or a quick lunch on the go
Crispy Chickpeas: The Star Ingredient
The chickpeas in these wraps not only provide a hearty texture but also a wealth of nutrition. A single can of chickpeas delivers over 12 grams of protein and a good source of fiber, making them an excellent choice for keeping you satiated. When roasted, they become crispy, adding a satisfying crunch that contrasts perfectly with the fresh veggies. This texture is crucial; avoid overcrowding the baking sheet to ensure each chickpea gets equal attention in the oven, allowing for an even crispiness.
To elevate the flavor profile, feel free to experiment with spices while coating the chickpeas. Adding a pinch of cayenne pepper can lend a spicy kick, while a dash of cumin introduces a warm, earthy note. Remember, the roasting process also concentrates these flavors, so be mindful of the amount you use. A good rule of thumb is to stick to the basic spices for your first attempt, adjusting them to your personal taste thereafter.
Customizing Your Wraps
The wrap's beauty lies in its versatility—feel free to customize the ingredients to suit your taste. While mixed greens provide a fresh base, adding ingredients like shredded carrots or sliced avocado can enhance the wraps both nutritionally and visually. If you're not a fan of feta cheese, consider crumbled goat cheese or a sprinkle of nutritional yeast for a dairy-free alternative that adds a cheesy depth.
If you're planning for meal prep, these wraps can be assembled up to a day in advance. However, to prevent the tortillas from becoming soggy, I recommend keeping the chickpeas and veggies separated until you're ready to eat. This method preserves the crunch of the chickpeas and the freshness of the veggies, ensuring every bite is delightful.
Tips for Perfecting Your Wrap
Wrapping techniques can make a big difference in your overall experience. Be sure to fold in the sides before rolling to secure the filling tightly, preventing any ingredients from spilling out during your first bite. A warm tortilla is also easier to roll—heat them briefly in a pan or wrap them in a damp paper towel and microwave for 10-15 seconds for optimal pliability.
If you find that your wraps are getting too messy, consider using larger tortillas or adding fewer ingredients to avoid overfilling. This will make them easier to handle without compromising on flavor. Additionally, for a delightful presentation, slice your wraps diagonally—this not only makes for easy eating but also showcases the colorful internal ingredients.
Ingredients
For the Wraps
- 1 can chickpeas, drained and rinsed
- 2 tablespoons olive oil
- 1 teaspoon paprika
- 1/2 teaspoon garlic powder
- Salt and pepper to taste
- 4 large tortillas
- 1 cup mixed greens
- 1/2 cup diced cucumber
- 1/2 cup diced bell peppers
- 1/4 cup diced red onion
- 1/4 cup feta cheese (optional)
- Hummus or your favorite sauce for spreading

Instructions
Prepare the Chickpeas
Preheat your oven to 400°F (200°C). In a bowl, toss the drained chickpeas with olive oil, paprika, garlic powder, salt, and pepper until well coated. Spread them out on a baking sheet in a single layer.
Bake the Chickpeas
Bake the chickpeas in the preheated oven for 15 minutes or until they are crispy and golden brown. Shake the pan halfway through to ensure even cooking.
Assemble the Wraps
While the chickpeas are baking, prepare your tortillas with a layer of hummus. Top with mixed greens, diced cucumber, bell peppers, and red onion.
Add the Crispy Chickpeas
Once the chickpeas are done baking, let them cool for a few minutes. Then, sprinkle the crispy chickpeas over the vegetables in each tortilla. If desired, add feta cheese.
Wrap and Serve
Fold the edges of the tortilla over the filling and roll it up tightly. Slice in half if desired and enjoy your delicious Crispy Chickpea Lunch Wrap!
Pro Tips
- Feel free to customize these wraps with any seasonal vegetables you have on hand. You can also substitute the hummus for avocado or tzatziki for a different flavor profile.
Storing and Reheating
If you've made more wraps than you can eat in one sitting, you can store them in an airtight container in the refrigerator for up to two days. Just be sure to place a piece of parchment paper between layers to maintain their texture. When reheating, a quick toast in a skillet is preferable, allowing the tortilla to crisp up while warming the filling without making it soggy.
For longer storage, consider freezing the chickpeas separately. They can last up to three months in the freezer. When you're ready to enjoy them, simply reheat in the oven at 400°F (200°C) for 10 minutes before assembling your wraps. This approach ensures that both the tortillas and chickpeas maintain their desired textures.
Serving Suggestions
These wraps pair beautifully with a zesty side salad or a bowl of soup if you're looking for a heartier meal. A refreshing cucumber and tomato salad with a light vinaigrette can complement the flavors of the wrap perfectly. For a more substantial accompaniment, try serving with a simple lentil soup—both are quick to prepare and offer a diverse range of nutrients.
For a fun twist, consider turning these wraps into a platter for gatherings. Cut them into bite-sized pieces and serve with an array of dipping sauces like tzatziki, spicy harissa, or baba ganoush. This presentation not only excites the palate but also makes for an appealing spread at parties or casual get-togethers.
Questions About Recipes
→ Can I use canned chickpeas?
Yes, using canned chickpeas makes the recipe quicker and easier!
→ What sauces can I use in the wraps?
You can use hummus, tzatziki, or any dressing you prefer.
→ Are these wraps suitable for meal prep?
Absolutely! Just store the chickpeas and fresh ingredients separately until ready to eat.
→ Can I use gluten-free tortillas?
Yes, any kind of tortilla will work, including gluten-free options.
Crispy Chickpea Lunch Wraps
Created by: The Opheliaskitchen Team
Recipe Type: Basic Cooking | Easy Food
Skill Level: Easy
Final Quantity: 4.0
What You'll Need
For the Wraps
- 1 can chickpeas, drained and rinsed
- 2 tablespoons olive oil
- 1 teaspoon paprika
- 1/2 teaspoon garlic powder
- Salt and pepper to taste
- 4 large tortillas
- 1 cup mixed greens
- 1/2 cup diced cucumber
- 1/2 cup diced bell peppers
- 1/4 cup diced red onion
- 1/4 cup feta cheese (optional)
- Hummus or your favorite sauce for spreading
How-To Steps
Preheat your oven to 400°F (200°C). In a bowl, toss the drained chickpeas with olive oil, paprika, garlic powder, salt, and pepper until well coated. Spread them out on a baking sheet in a single layer.
Bake the chickpeas in the preheated oven for 15 minutes or until they are crispy and golden brown. Shake the pan halfway through to ensure even cooking.
While the chickpeas are baking, prepare your tortillas with a layer of hummus. Top with mixed greens, diced cucumber, bell peppers, and red onion.
Once the chickpeas are done baking, let them cool for a few minutes. Then, sprinkle the crispy chickpeas over the vegetables in each tortilla. If desired, add feta cheese.
Fold the edges of the tortilla over the filling and roll it up tightly. Slice in half if desired and enjoy your delicious Crispy Chickpea Lunch Wrap!
Extra Tips
- Feel free to customize these wraps with any seasonal vegetables you have on hand. You can also substitute the hummus for avocado or tzatziki for a different flavor profile.
Nutritional Breakdown (Per Serving)
- Calories: 350 kcal
- Total Fat: 12g
- Saturated Fat: 1g
- Cholesterol: 0mg
- Sodium: 150mg
- Total Carbohydrates: 50g
- Dietary Fiber: 10g
- Sugars: 5g
- Protein: 12g